
Using Terraform to create a Kubernetes cluster
Over the past few years, Infrastructure as Code (often abbreviated as IaC) has become one of the cornerstones of the DevOps and cloud-native world. Among the available tools, Terraform has established itself as a robust and flexible solution for defining, versioning, and managing infrastructure in a declarative way.
Although most major cloud providers offer their own integrated tools — such as AWS CloudFormation or Azure Resource Manager — these often come with limitations and significant differences. Each service follows its own logic, lacking a unified and shared language. This fragmented approach can slow teams down and complicate infrastructure updates.
This is where Terraform truly stands out: a provider-agnostic tool with a consistent, portable configuration language.
In this tutorial, we’ll guide you step by step through the process of creating a fully functional, scalable Terraform Kubernetes cluster.
Terraform and Everything You Need to Get Started
To start building your Kubernetes cluster with Terraform, make sure you have the following:
- Terraform
- An AWS account
- An IDE (we recommend IntelliJ IDEA with the “Terraform and HCL” plugin)
Installing Terraform
To install Terraform, follow the instructions provided here: https://developer.hashicorp.com/terraform/install.
For Windows users, we recommend using Chocolatey — one of the available package managers — by running the command choco install terraform -y.
If you already have Terraform installed, update it with the command choco upgrade terraform -y.
To verify the installation or upgrade, open a terminal and type terraform -version.
If everything went correctly, you’ll see the version of Terraform currently installed — ready to be used for your Terraform Kubernetes setup.
Sign In
Follow this guide to install the AWS CLI (required to connect to AWS): https://docs.aws.amazon.com/cli/latest/userguide/getting-started-install.html.
To obtain your access keys:
- Log in to the AWS Management Console.
- Click on “IAM” (Identity and Access Management).
- Select “Users” and choose your user profile.
- Open the “Security Credentials” tab and click “Create New Access Key.”
- Select “Command Line Interface (CLI).”
- Save the Access Key ID and Secret Access Key values in a secure location.
Run the command aws configure and enter the two codes you just generated.
You are now ready to start building your Kubernetes cluster with Terraform.
Let’s get started!
Two important notes:
- By following this process, you should expect to incur a small cost, as Amazon EKS is not a free service.
- There are pre-built modules available from AWS and Azure; however, their use is not recommended as they are often outdated. In addition, managing which components to install—or exclude—can quickly become complex and time-consuming.
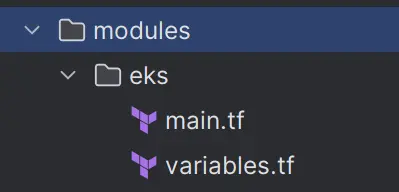
1. Project Setup
Start by creating a new empty project, then add a modules folder and a subfolder named eks. Inside modules, you’ll place the various components of your cloud infrastructure required to deploy your Kubernetes cluster with Terraform.
From the project root, create the following three files:
providers.tf: contains the provider declarations — the plugins that act as a bridge between Terraform and your cloud provider (in this case, AWS).variables.tf: defines the variables you can reference throughout your Terraform configuration.main.tf: lists the resources to be deployed. Here, you’ll include only the module declarations to be imported.
2. The providers.tf file
Let’s write the following code inside the providers.tf file.
terraform {
  required_providers {
    aws = {
      source  = "hashicorp/aws"
      version = "~> 6.5.0"
    }
  }
}

provider "aws" {
  region = var.aws_region
}
3. The variables.tf file
Enter the variable representing the region (change it as you see fit).
variable "aws_region" {
    default = "eu-south-1"
}
If desired, you can add the variable containing the cluster name.
variable "cluster_name" {
  default = "demo-eks-cluster"
}
4. Il file main.tf
Inside this file, you can configure the EKS module, which will contain everything you need to start installing the cluster.
module "eks" {
  source = "./modules/eks"
}
But that’s not all.
With the following piece of code, you define the availability zones for the specified region — in this example, eu-south-milan-1a, eu-south-milan-1b, and so on.
This step ensures that your Terraform Kubernetes infrastructure is distributed across multiple zones, improving reliability and fault tolerance.
data "aws_availability_zones" "available" {
  filter {
    name   = "opt-in-status"
    values = ["opt-in-not-required"]
  }
}
Now add the VPC (Virtual Private Cloud); the cidr_block must be a private range, and you can choose the subnet mask.
resource "aws_vpc" "main" {
  cidr_block = "10.0.0.0/16"
}
Use the following block to create subnets; the code cycles through availability zones and provides 256 addresses for each availability zone as IP addresses (cidr_block), so that you have unique addresses.
resource "aws_subnet" "eks_subnet" {
  count = 2
  vpc_id = aws_vpc.main.id
  cidr_block = cidrsubnet(aws_vpc.main.cidr_block, 8, count.index)
  availability_zone = data.aws_availability_zones.available.names[count.index]
  map_public_ip_on_launch = true
}
resource "aws_internet_gateway" "main" {
  vpc_id = aws_vpc.eks_vpc.id
}
Then enter the following code to create a gateway and a routing table. This allows the cluster (actually any resource within the newly created VPC) to access the Internet, and the last resource associates the routing table with the subnets.
resource "aws_route_table" "public" {
  vpc_id = aws_vpc.main.id

  route {
    cidr_block = "0.0.0.0/0"
    gateway_id = aws_internet_gateway.main.id
  }
}
resource "aws_route_table_association" "route_table" {
  count = 2
  subnet_id = aws_subnet.public_subnet.*.id[count.index]
  route_table_id = aws_route_table.public.id
}
To manage the roles of clusters that have access to both EKS and EC2 (the cluster nodes are EC2 machines), insert the following code blocks.
resource "aws_iam_role" "cluster" {
  name = "${var.cluster_name}-iam-role"
  assume_role_policy = jsonencode({
    Version = "2012-10-17"
    Statement = [
      {
        Action = [
          "sts:AssumeRole",
          "sts:TagSession"
        ]
        Effect = "Allow"
        Principal = {
          Service = "eks.amazonaws.com"
        }
      },
    ]
  })
}
resource "aws_iam_role" "node_group" {
  name = "${var.cluster_name}-iam-role-ng"
  assume_role_policy = jsonencode({
    "Version": "2012-10-17",
    "Statement": [
      {
        "Effect": "Allow",
        "Principal": {
          "Service": "ec2.amazonaws.com"
        },
        "Action": "sts:AssumeRole"
      }
    ]
  })
}
5. Cluster creation
Use the following code block to create the cluster.
resource "aws_eks_cluster" "cluster" {
  name = var.cluster_name

  access_config {
    authentication_mode = "API"
  }

  role_arn = aws_iam_role.cluster.arn
  version  = "1.33"
  remote_network_config {
    remote_node_networks {
      cidrs = ["172.16.0.0/18"]
    }
    remote_pod_networks {
      cidrs = ["172.16.64.0/18"]
    }
 }

 vpc_config {
  endpoint_private_access = true
  endpoint_public_access  = true
  subnet_ids = aws_subnet.public_subnet.*.id
  }
depends_on = [aws_iam_role_policy_attachment.cluster_AmazonEKSClusterPolicy]
}
In this step, the cluster is created by specifying a specific version. If the corresponding line is removed, AWS will automatically install the default version. In addition, the role, VPC, and related policies are associated.
This step will most likely be the longest of the entire creation process.
resource "aws_eks_node_group" "node_group" {
  cluster_name = aws_eks_cluster.cluster.name
  node_group_name = "${var.cluster_name}-ng"

  node_role_arn   = aws_iam_role.node_group.arn
  subnet_ids      = aws_subnet.public_subnet.*.id

  scaling_config {
    desired_size = 1
    max_size = 2
    min_size = 1
  }

  update_config {
    max_unavailable = 1
  }

  depends_on = [
    aws_iam_role_policy_attachment.node_AmazonEKSWorkerNodePolicy,
    aws_iam_role_policy_attachment.node_AmazonEC2ContainerRegistryReadOnly,
    aws_iam_role_policy_attachment.node_AmazonEKS_CNI_Policy,
  ]
}
This block of code is used to create the node group connected to our cluster, associating it with the subnet defined above. The cluster will be initialised with a single node.
We’re almost done!
The only thing missing is the policy attachments, i.e. the links between the roles and AWS policies.
resource "aws_iam_role_policy_attachment" "cluster_AmazonEKSClusterPolicy" {
  policy_arn = "arn:aws:iam::aws:policy/AmazonEKSClusterPolicy"
  role  = aws_iam_role.cluster.name
}

resource "aws_iam_role_policy_attachment" "cluster_AmazonEKSNetworkingPolicy" {
  policy_arn = "arn:aws:iam::aws:policy/AmazonEKSNetworkingPolicy"
  role  = aws_iam_role.cluster.name
}

resource "aws_iam_role_policy_attachment" "cluster_AmazonEKSLoadBalancingPolicy" {
  policy_arn = "arn:aws:iam::aws:policy/AmazonEKSLoadBalancingPolicy"
  role = aws_iam_role.cluster.name
}

resource "aws_iam_role_policy_attachment" "cluster_AmazonEKSComputePolicy" {
  policy_arn = "arn:aws:iam::aws:policy/AmazonEKSComputePolicy"
  role  = aws_iam_role.cluster.name
}

resource "aws_iam_role_policy_attachment" "node_AmazonEC2ContainerRegistryReadOnly" {
  policy_arn = "arn:aws:iam::aws:policy/AmazonEC2ContainerRegistryReadOnly"
  role = aws_iam_role.node_group.name
}

resource "aws_iam_role_policy_attachment" "node_AmazonEKSWorkerNodePolicy" {
  policy_arn = "arn:aws:iam::aws:policy/AmazonEKSWorkerNodePolicy"
  role = aws_iam_role.node_group.name
}

resource "aws_iam_role_policy_attachment" "node_AmazonEKS_CNI_Policy" {
  policy_arn = "arn:aws:iam::aws:policy/AmazonEKS_CNI_Policy"
  role = aws_iam_role.node_group.name
}
Some explanations about configurations
I will provide brief explanations to clarify the reason for all these configurations. They are necessary for the EKS control plane to function properly.
- AmazonEKSClusterPolicy
- Allows the EKS service to create and manage the resources needed for the cluster.
- Includes permissions to interact with EC2, IAM, ELB, and other cluster-related resources.
- Without this policy, EKS would not be able to orchestrate nodes.
- AmazonEKSNetworkingPolicy
- It allows the control plane to manage network resources (VPC, subnet, ENI, Security Group).
It is used to ensure communication between pods, nodes, and the control plane.
- It allows the control plane to manage network resources (VPC, subnet, ENI, Security Group).
- AmazonEKSLoadBalancingPolicy
- Gives EKS permission to interact with AWS load balancers (ALB/NLB/CLB).
Required when using LoadBalancer Service in Kubernetes to expose apps.
- Gives EKS permission to interact with AWS load balancers (ALB/NLB/CLB).
- AmazonEKSComputePolicy
- It allows EKS to manage the compute side: node scaling, interaction with Auto Scaling Groups, and EC2 resources.
These are required for worker nodes (EC2) to operate in the cluster:
- AmazonEC2ContainerRegistryReadOnly
- Allows nodes to download images from Amazon ECR.
Essential if your pods use containers stored on ECR.
- Allows nodes to download images from Amazon ECR.
- AmazonEKSWorkerNodePolicy
- Allows nodes to communicate with the EKS control plane.
- Gives workers the minimum permissions to be part of the cluster (join, heartbeat, registration, etc.).
- AmazonEKS_CNI_Policy
- Required for the EKS CNI plugin (Amazon VPC CNI).
- Allows pods to obtain IP addresses from the VPC and configure the network (create/modify ENIs, assign secondary IPs).
Run the cluster with Terraform
With the project and files you’ve created, you’re now ready to run everything. Start by executing the terraform init command — this will download the necessary provider plugins and set up the required resources.
Next, use terraform plan to preview the actions Terraform will perform before deployment.
To install and deploy your Kubernetes cluster with Terraform, run terraform apply (when prompted with “Are you sure you want to proceed?”, type “yes”).
[As mentioned at the beginning of this article, please note that this operation is not free of charge.]
After a few minutes — the process may take up to 30 minutes — your Kubernetes cluster will be ready and accessible through the AWS console.
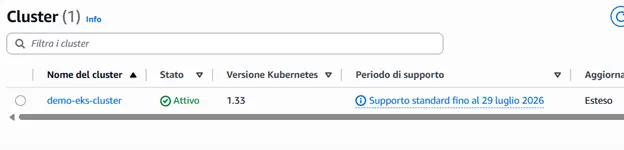

All that’s left to do is connect!
I’ll leave you with one last but no less important command: terraform destroy, which allows you to remove the cluster with all its elements (again, you’ll need to answer affirmatively to continue the operation).
Conclusions
In this first article, you learned how to create a Kubernetes cluster using Terraform. In the next episode, I will show you how to install some useful tools directly into the cluster from the command line, and much more!