MIT App Inventor: a natural bridge from Scratch to real programming
For children curious about the world of programming, Scratch is an excellent starting point: colorful blocks, animated sprites, visual logic, storytelling, and games — all just a drag and drop away. It’s fun, intuitive, and perfect for understanding the fundamental concepts of logic (if you’re interested, read my article (in italian) “Scratch & Coding – Imparare a programmare divertendosi“).
As time goes by, children grow and mature — and naturally, their interests evolve. From simple games or animations, they may start wanting to create something more “real”: a smartphone app that interacts with GPS and other sensors, reads, saves, or modifies data in a database, and so on.
This is where MIT App Inventor comes in — a block-based development platform (much like Scratch), ideal for those who want to take their first steps into mobile app development for Android (and now also for iOS).
In this article, we’ll explore what Scratch and MIT App Inventor have in common, how they relate to programming, its key features, and finally, a simple tutorial for Android smartphones.
Similarities between Scratch and MIT App Inventor
App Inventor and Scratch share several key elements, summarized below:
- Block-based, drag-and-drop interface: a gradual learning curve, perfect for those already familiar with Scratch.
- Event-driven logic: blocks represent actions (such as pressing a button or touching the screen) and their corresponding reactions (modifying text, navigating between screens, etc.).
- Immediate feedback: in Scratch, animations are displayed instantly, while in App Inventor it’s possible to test the app in real time on a device using the MIT AI2 Companion.
These development environments are based on the Object-Oriented Programming (OOP) paradigm, whose core concepts are summarized in the next section.
Basic concepts of Object-Oriented Programming
- Objects: components of the application that interact with each other.
- Attributes: each object is defined by specific characteristics (for example, a Person has attributes such as name, age, and height).
- Methods: actions that an object can perform (e.g., jump, run, speak).
- Messages between objects: objects can communicate with each other by exchanging information.
Example: the “child” object has attributes such as name, height, gender, and age, and methods such as jumping, laughing, or drawing. It can interact with other children by exchanging messages.
But what does MIT App Inventor look like? Let’s find out together.
The MIT App Inventor development environment
Designer: building the interface
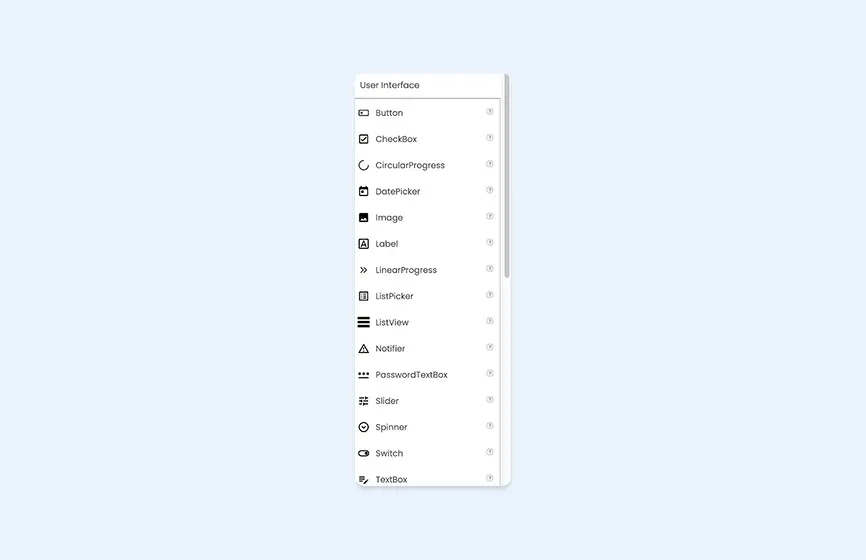
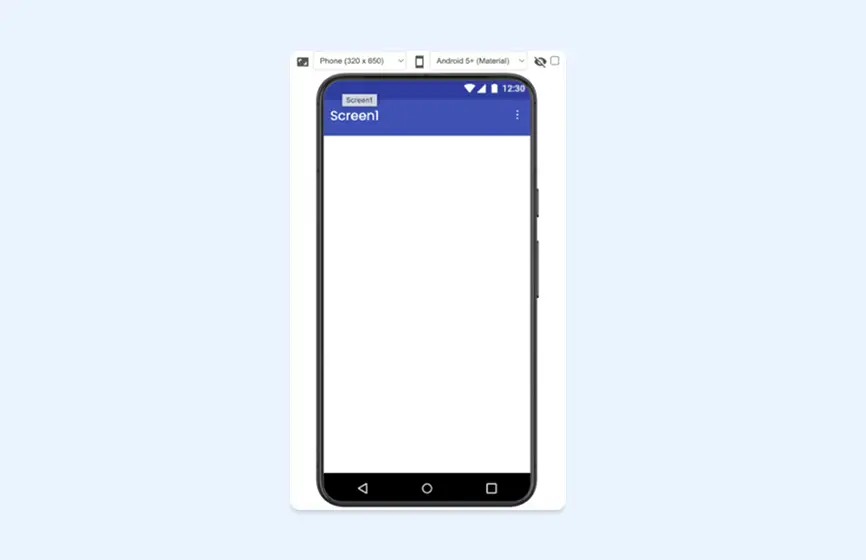
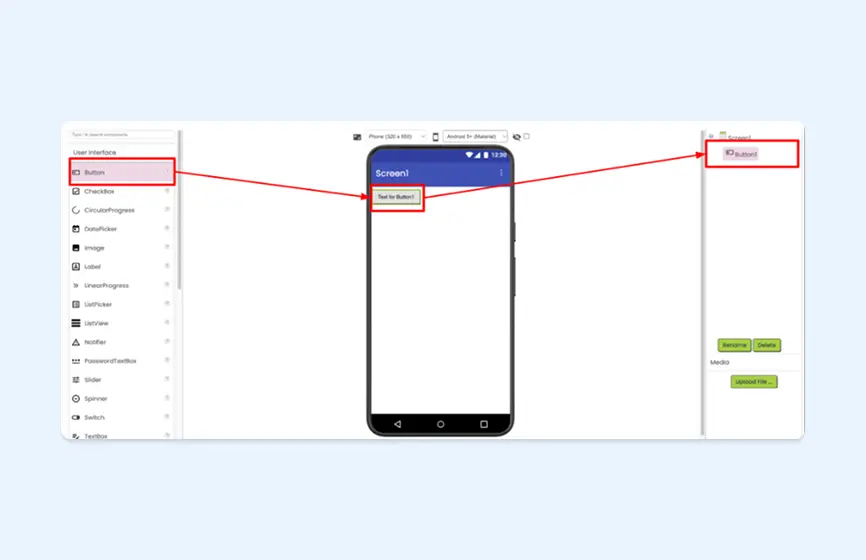
Designer mode allows you to define how the application will appear on the smartphone. It is divided into five main sections:
- Palette: contains all available components (Button, CheckBox, Label, Camera, Sound, etc.) divided into categories. Some components are ‘invisible’ but work behind the scenes.
- Viewer: reproduces the smartphone screen. Components from the Palette are dragged and dropped into it.
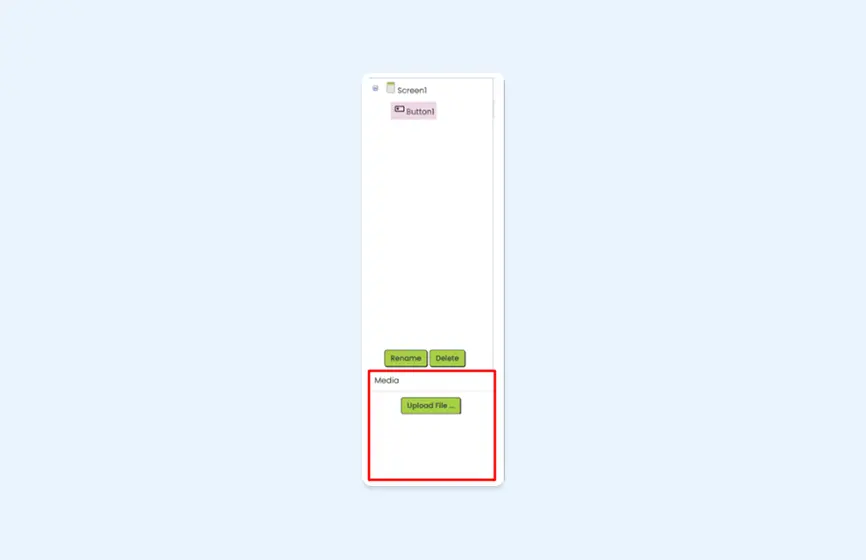
- Components: summarises all objects entered in the Viewer section, showing any containment relationships.
- Media:allows you to upload images and audio files to use in the application.
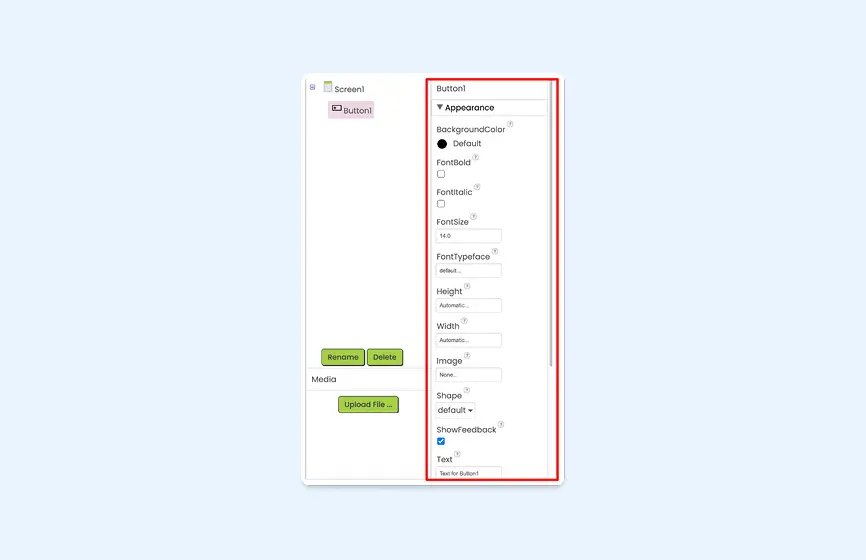
- Properties: allows you to configure the attributes of each component, such as initial text, colours, and dimensions.
In Designer, you then define objects, layout, appearance and initial values. However, the application is still static: you need to switch to Blocks mode to bring it to life.
Blocks: the application’s brain
In Blocks, you define the logic of the app without writing code. The coloured blocks fit together like pieces of a puzzle, making programming intuitive and minimising syntax errors that would otherwise occur when writing code by hand.
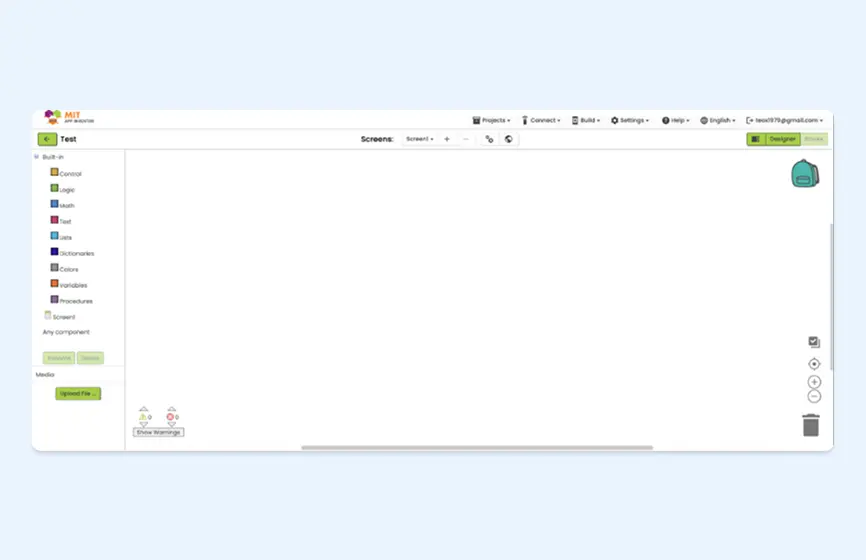
Types of Blocks
- Control: everything used to define the logical flow (if/else statements, loops).
- Logic: for working with true/false values and logical operators.
- Math: includes calculations, random numbers, and mathematical functions.
- Text: for string management.
- Lists and Dictionaries: for handling collections and key-value associations.
- Colors: for selecting and customizing colors.
- Variables: to store and reuse values.
- Procedures: reusable blocks similar to functions.
Component Blocks
Every time you add a component in the Designer, its corresponding blocks automatically appear:
- Events: define what happens when the user interacts (for example, clicking a button).
- Actions: specify what the component should do (e.g., change the text).
- Properties: read or modify the component’s attributes (e.g., color, displayed text).
Thanks to these blocks, the application comes to life: buttons respond, text changes, sensors are read, and data is saved or sent to a server. In short, this is where an idea turns into a working app.
MIT App Inventor: extensions
Extensions are additional components created by third parties or the App Inventor community that allow you to extend your app’s capabilities beyond those offered by the standard components.
What They’re For
Some smartphone features are not included by default, such as:
- turning the flashlight on or off;
- Bluetooth control;
- accessing specific sensors;
- interacting with particular online services.
Extensions make it possible to add these features without writing complex native code.
How to use them
Using extensions in your project requires just three simple steps:
- Download the extension file (.aix).
- In the App Inventor Designer section, click “Import extension” and select the .aix file.
- Use the extension like any other component.
A practical example: the “Flashlight” feature
To use the flashlight, you need the TaifunFlashlight extension, since the standard Camera component does not support this function. Thanks to this extension, you can use blocks such as “Turn On” and “Turn Off” just as if the flashlight were a standard component.
MIT App Inventor: a simple step-by-step tutorial for Android
Now that we’ve explored the App Inventor development environment, let’s walk through a simple Android tutorial that will guide you in creating a button to turn your smartphone’s flashlight on and off using the TaifunFlashlight extension.
-
- Go to the MIT App Inventor 2 site and select the Gmail account you wish to use to log in.
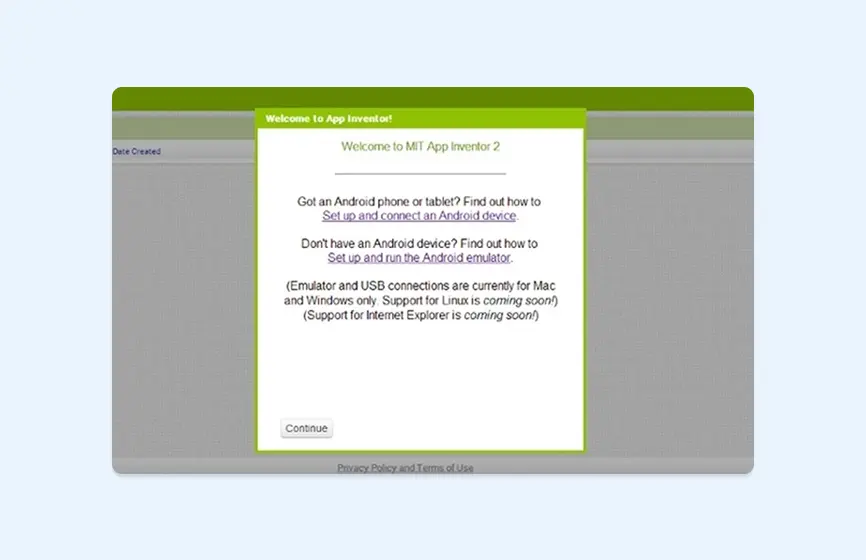
- After the first login, click on “Set up and connect an Android device” and then on Continue: the development environment is now ready to use.
- Download the MIT AI2 Companion app from Google Play. Before continuing, ensure that your computer and smartphone are connected to the same Wi-Fi network.
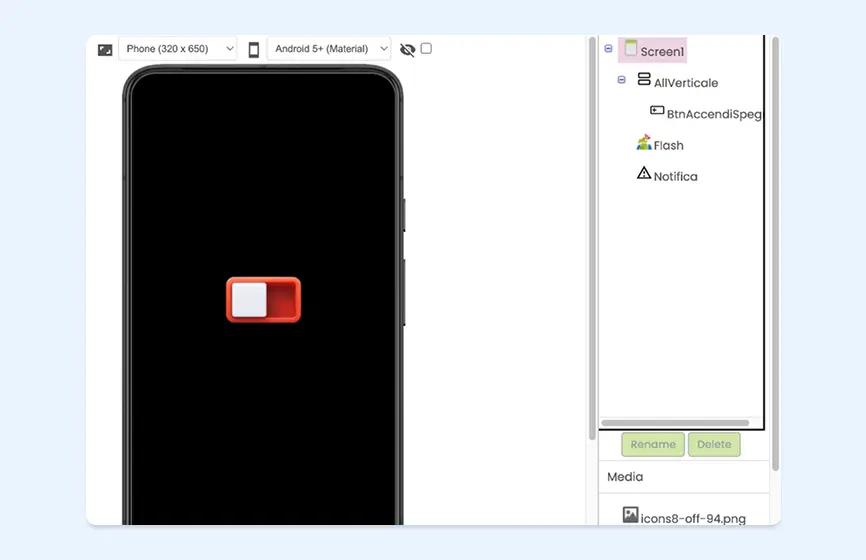
- In App Inventor, go to the Designer section.
- Import the two buttons that will be used to turn the torch on and off into the media.

- From the layout section, add a VerticalArrangement (vertical alignment) and set the following properties:
- black background;
AlignHorizontalandAlignVerticalto center;HeightandWidthto Fill Parent.
- Add a Notifier component.
- Add a Button to the screen:
- drag the button inside the VerticalArrangement (it should appear centered on the screen);
- set the button image to the “off” button (the red one).
- Retrieve the TaifunFlashlight component from the extension.
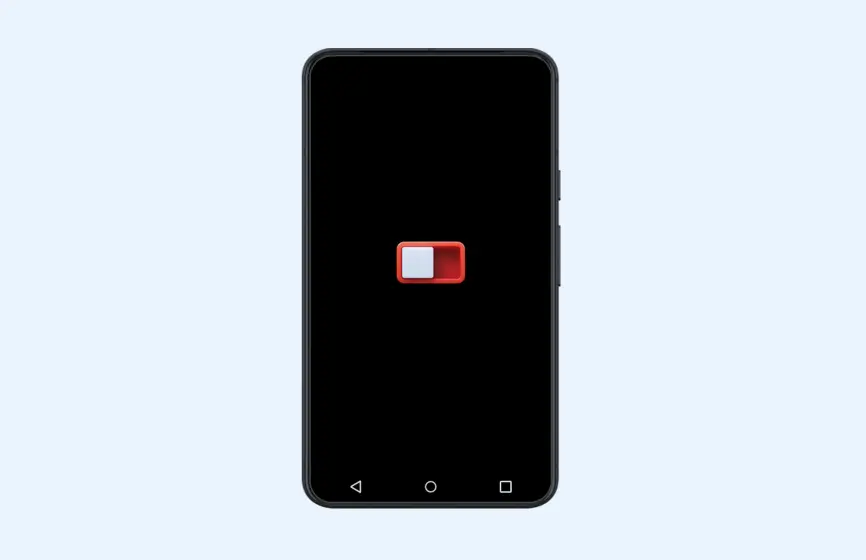
Once you have completed these steps, you should obtain a result similar to the one shown in the figure:
Once all the elements have been positioned on the Designer section screen, you can start ‘writing’ the code.
The code
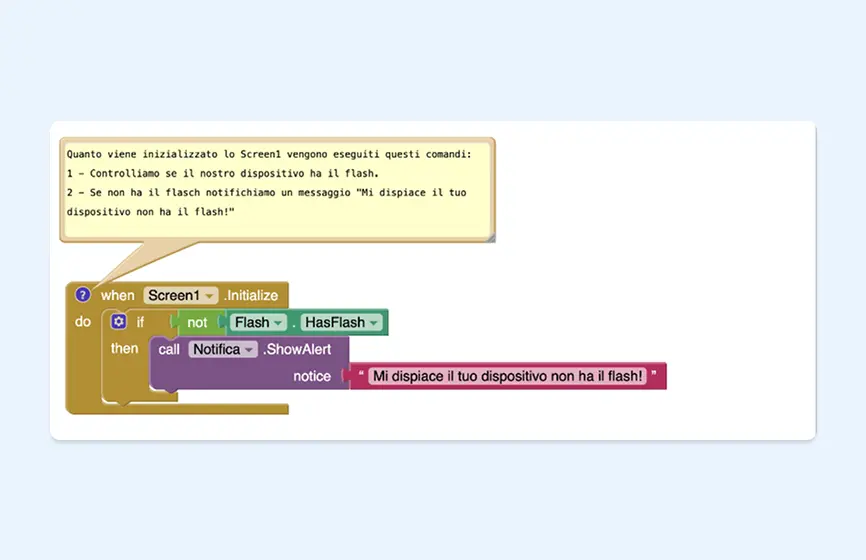
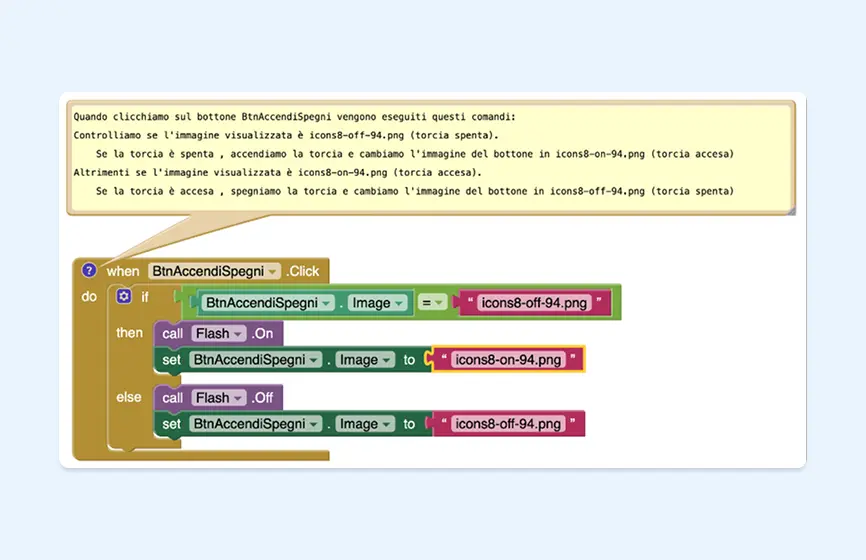
Go to the Blocks section and “write” the code.
Conclusion
MIT App Inventor serves as a natural bridge between Scratch and real-world programming: it maintains the simplicity of block-based programming while introducing advanced concepts such as object-oriented programming, device interaction, and data management.
For students—and anyone interested in exploring the world of software development—it represents a solid first step toward creating mobile applications, with the possibility of progressing later to textual languages like Java, Kotlin, or Python.